Perfect... Imperfection... Seeking A Balance...

Friday, April 29, 2011

Alphabet Book : h

P1010102 This piece of art Mummy got the ideas from a book cover from the internet. It is a hand print art, a crab shape. All of us having fun doing it.

You'll Need:

  • Drawing paper
  • Water Colours
  • Pink colour construction paper
  • Wiggle eyes or circle shape white paper

P1010103 To Make:

  1. Using kids favourite water colours, mixing, and paint it on both hands. The children were laughing all the way during we doing it. Issac and Annabelle said it is so tickle when the brushes their palm with the water colours.
  2. Have kids just print their both hands onto the drawing paper. It make the body of the crab.
  3. Wash their hands clean, dry it, and prepare for our chelae or claw on top of the crab’s head. Cut out a half round shape from the pink colour construction paper, and trim it with zig zag shape. Glue it on both side.
  4. Glue the wiggle eyes on both chelae. We just glued with circle shape and draw the eyes with black marker pen.

Tuesday, April 26, 2011

h is for horse

P1010096 The following is the lower case ‘h’. This round is horse.

What You’ll Need:

  • Light and dark brown foam
  • a wiggly eye
  • pen & pencil
  • glue/tape
  • scissors

P1010097 How to Make the ‘h’ for horse:

  1. Cut out a lowercase ‘h’ from a piece of a dark brown foam sheet. To make the letters go along with the uppercase letters we’ve done in the past, this letter was cut from a piece of foam that was about 4” x 4”.
  2. Cut out two small ears and a head for the horse out of the excess dark brown foam.
  3. Cut out a tail and a mane from the light brown foam sheet.
  4. Glue/tape on the head, ears, tail and mane.
  5. Add the wiggly eye and read the book again with your little one and try to do some of the things along with the horses!

We just played along with our fun crafts. And, it is really easy to see whose artwork  and who’s? ^^

Thursday, April 21, 2011

Alphabet Book : H

P1010094 This is the water colour session again and with some cutting and pasting works.

You'll Need:

  • Drawing paper
  • Water Colours
  • Colour papers

P1010095 To Make:

  1. Draw out the party hat shape in triangle shape.
  2. Let the children water colouring it.
  3. Cut out the various sizes of star shapes using the colour papers, and paste it on the party hat.

Issac even paste the stars in an clown face order. Big eyes, big nose, moustache and a smiles on orange colour party hat with a star on top; Annabelle’s too a star on top of the yellow colour party hat.

Tuesday, April 19, 2011

H is for House

P1010098 Even we are sick at home…our art craft still going on. I guessed this is the only ‘fun’ that we had during our activities at home…ha-ha…

What You'll Need:

  • White and blue foam sheet/construction paper
  • Scissors
  • Pencil {to outline/trace letter} 
  • Fake flowers
  • Marker
  • Glue

P1010099 How to make the 'H' House:

  1. Trace and cut an uppercase 'H' out of the blue foam sheet or construction paper.
  2. Using the white foam, cut out two rectangles for windows, a larger rectangle for a door, a triangle for the roof, and a thin rectangle for a window box.
  3. You can add window panes to the windows by either cutting them out with really fine scissors ~ or you can draw them on with a marker. :)
  4. Glue on the roof, windows, door and window box.
  5. Add some flowers to your window box if you decide to add one. Well, Issac just using his colour markers to add on the flowers with assorted colours – red, pink, yellow and orange. He quite of like it very much.
  6. Put a doorknob on your door.

Annabelle was so naughty that she went on and scribbled all over the House…:S. Issac just laughed and said. “Mummy, Belle’s house is on fire! Very funny, very funny, ha-ha, ha-ha…”

Resource: http://totallytots.blogspot.com

Sunday, April 17, 2011

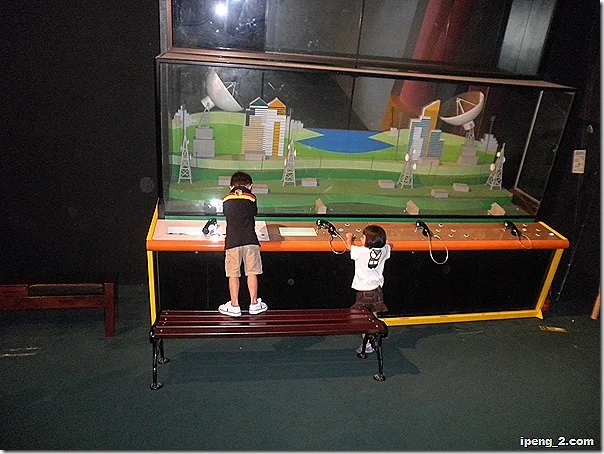
Dinos Alive World Tour @ National Science Centre 17 Apr 2011

P4170317

It is a Sunday and we went to National Science Centre at Bukit Kiara. There is a Dinosaurs Exhibition going on now.

The ‘Dinos Alive World Tour – Malaysia' was on the Pusat Sains Negara from last year 1st December already. The exhibition will be ended on 31st May 2011.  That is why I am planning to come here before it will end next month.

P4170272

We walked through the fresh water fish glass tunnel aquarium towards the science exhibition areas. All the displays or exhibits are interactive with the visitors, in order to explain or make science a fun thing to explore.

P4170252

Wait until we came to the open bright space, and we saw the gigantic Tyrannosaurus Rex which is one of the highlights, stands at a towering height of 5 meters in height which is equivalent to two Sumatran elephants stacked on top of another and the largest exhibit.

P4170268

It is one of the veritable dinosaurs extravaganza will be treated to a complete pre-historic experience with over 25 dinosaurs. There are Apatosaurus measuring 21 meters in length is close to the size of the world’s largest mammal, the blue whale. Some of the dinosaurs will appear life like thanks to the sound and light effects.

P4170270

Dinos Alive is interactive edu-tainment, a “walk through” exhibition with dramatic displays of our life size Dinosaurs and fun activities for children. There will be an area furnished with a fossil dig pit for the little ones too. This tour will be an interactive educational experience for kids and adults too.

P4170292

Both Issac and Annabelle were happy and feeling curious on the things that they saw in front of them. Everything they want to touch and feel and eagerly want to know the outcome of it. I was happy that they were having fun as well.

After which we have visited all the exhibits indoor, such as Fascinating Tunnel, Islam and Science Corner, Electric Corner, Science Mall, Wonders Park, Pathway to Science, Kids Discovery, Eureka, Kidsz World and Peneroka Comel. We went out from the Centre towards the garden.

P4170301

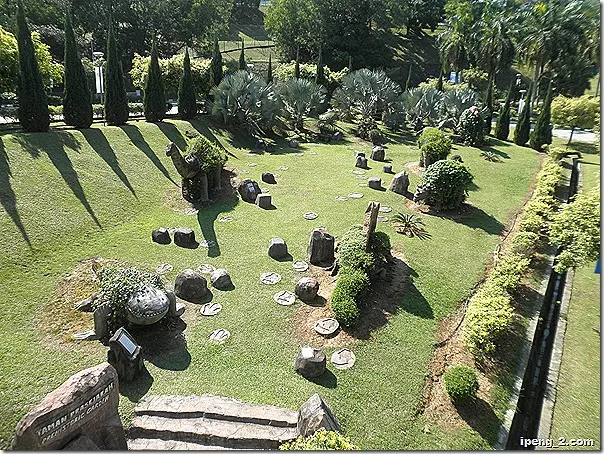
The Science Educational Park outdoor exhibits which includes Aquatic Life, Garden of Nature, Herbal Garden, Focal Point, Activity Arena, Water Plaza, Interactive Zone, Subterranean Journey, Pre Historic Garden, etc.

They feel more happy on this park too, but the weather was so hot in the morning, made us all sweat!

P4170312

We went back home after the Pre Historic Garden. What a Dinosaurous Day for the kids!

P4170248

Thursday, April 14, 2011

Alphabet Book : g

PC180005 Mummy really sometimes run out of ideas for the letter, and mummy will browse through the internet and searching for some fun making art projects for kids. And, and next will be ‘g’ for ginger bread man.

You'll Need:

  • Drawing paper
  • Oil pastels / Colour papers
  • Pencil
  • Ribbons for the ginger bread man

To Make:

  1. Draw out the ginger bread man on the drawing paper.
  2. Have kids just colour it using the oil pastels only. Because we had our few lessons earlier using the water colours, so Mummy thinking of just change our colour media. Started with the ginger bread man itself and then the background of the drawing paper.

PC180004 Oil pastels for such a big piece of drawing paper probably works for Issac but somehow it doesn’t work for Annabelle. Issac is ‘big’ enough to handle the oil pastels very well, but for Annabelle, it is too boring for her just to colour it. The outcome really not a ‘good artwork’.

  1. Thus, Mummy just cut out the ginger bread man using a few pieces of the colour papers, and ask her to glue it on the drawing paper. Then, she is only getting interested in what she is doing.
  2. As for the scarf for the ginger bread man, Mummy just took out the linen on the small decorative basket which i got it on the other day when i visited the bank, fold it and use the double sided tape to tape in around the neck area. And finally done.

From this lessons, even thought we are learning the same subject but a method for a younger child might not a good one or suitable for your another toddler.

Any how, both kids finally have fun with their two own version of ginger bread man for today.

Tuesday, April 12, 2011

g is for goose

It’s lower case time for ‘g’ this week – goose.

P1010100 What You’ll Need:

  • white and yellow foam
  • white feathers
  • wiggly eye
  • scissors
  • tape/glue

P1010101 How to Make the ‘g’ for goose:

  1. Cut out a lowercase ‘g’ from a piece of a white foam sheet.
  2. Cut a beak out of the yellow foam.
  3. Glue/tape the beak onto the letter ‘g’ and add on the feather and the wiggly eye.

There were some modifications on the goose’s white feathers. Mummy had changed it to use the small white round cotton ball in stead of the white feathers. The children just pulled around the small wool to make it looks like a feather for that.

And, as always, just using the black marker to draw the eyes.

Both were having fun, and it is a fast track art craft for the night.

Resource: http://totallytots.blogspot.com

Thursday, April 7, 2011

Alphabet Book : G

PC100019This is ‘G’ week. So Mummy prepared some water colour again for the ‘Grape’ – a few circles, and two leaves. And, here we go…

You'll Need:

  • Drawing paper
  • Water Colours
  • Pencil
  • Fifty Cent – tool to draw the circles of grapes.

PC100018 To Make:

  1. Draw out some circles shape on the drawing paper for grapes.
  2. Draw out leaves and stem for the grapes.
  3. Have kids just colour it. Started with the purple colour first, as Mummy mixing the red colour and blue colour to become purple, let the kids see the changing of the colour as well when they try this.
  4. Green colour leaves will be the mixing colours between blue and yellow.

PC100027

 PC100028Both were enjoying the water colouring very much!!!

Wednesday, April 6, 2011

Visit to GK Organic Farm 6 Apr 2011

IMG_1709Visit to an Organic Farm actually is one of the guided educational trip organized by Tadika Brainchild as their annual trip.

The difference this year is only previously only Daddy accompanied Issac for the trip, whereby this year Annabelle already 4 years old and she is allowed to join the trip.

Thus, Daddy accompanied Issac and Mummy accompanied Annabelle this year. We all were allocated in the different bus. Total there were 2 buses together.
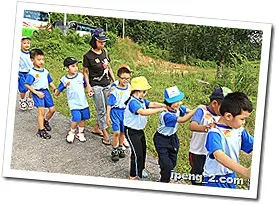
IMG_1716We assembled at the school at as early as 8:00am. All the kids were wearing their school T-shirts and pants. Of course, as usual there were kids who were late due to the parents cannot send to the school early on time.

Then, we took off around 8:30am towards to Bangi. It was quite a far journey on the bus itself. There were games, singings and cartoons going on inside the bus.

After we came out from the Toll, we were entering the more winding roads towards the farm surrounded by the oil palm plantations in the Kampung Sungai Buah. The buses just stopped at the entrance of the road. We walked down and start to walk to the farm itself.
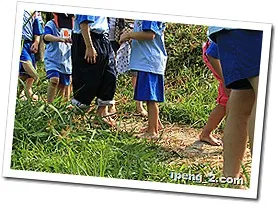
IMG_1741Once we entered to the farm, the first thing caught our eyes is the compost. Then, we came to know the owner of the farm, Mr. Gan himself, we were given a briefing on what is organic and save or love our environment, then we had been took for a farm walk with our bare foot!

Yes! bare foot. It was not really comfortable in the very beginning but after sometimes then we will get use to it. Of course, not every child are get use to it, and Annabelle is one of them. End up, Mummy have to carry her all the way.
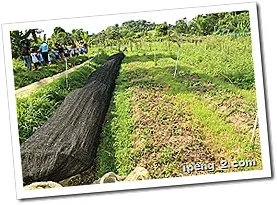
IMG_1737We were been introduce what is the shapes of vegetable of Sawi, Long beans, siau pak choi, brinjal, lady fingers, and so much more, including the fruit trees as well.

All of the vegetables are without pesticides and using man hours and labor to grow it.

At the end of the farm, we came to an empty land where we are ask to harvest sweet potatoes which we can take back home.
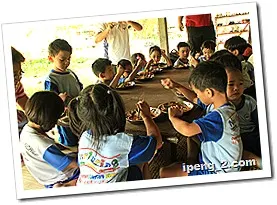
IMG_1773Our farm tour ended and gathered back to the open hall. All the teachers and children were sweating and tiring. Then, we had been introduced to the enzyme making demo. It is not really difficult to do the homemade enzyme!

Then, around 12.30pm we had our full organic buffet lunch. Mummy will never think of the vegetarian or organic food can do such a lovely aroma and taste. It is so refreshing! All of us go at least for 2nd round for the buffet.

Later, some of the parents and teachers were had the chance to shop in GK’s homemade organic products, fresh vegetables and fruits.

We left around 1:30pm and reached school around 2:30pm, nearly 3:00pm. During our journey back, all the children were so tired and most of them fall asleep in the bus.

This is actually a quite an experience for both Issac and Annabelle, as they are considered city boy and girl.

Bare foot walking, in fact Issac had more experienced on that, because Mummy had carried Annabelle all the way, in the end, Mummy was more tiring than Belle.

Tuesday, April 5, 2011

G is for Goat

PB280023 Here come the ‘G’ for the week – Goat. and the rest of G and g for the next week too.

What You'll Need:

  • White and brown foam sheet/construction paper
  • Scissors
  • Pencil {to outline/trace letter} 
  • Googly eye
  • Crayon {if you want to color your goat}
  • Glue

PB280024 How to make the 'G' Goat:

  1. Trace and cut an uppercase 'G' out of the foam sheet or construction paper.
  2. Using the extra white foam, cut out two small triangles for horns.
  3. Cut out a ‘beard’ and ears from the brown foam {you can choose the colour for the goat’s beard}.
  4. Fringe the goat’s beard with the scissors so it looks more like hair.
  5. Color your letter G with a brown crayon to give your goat a little colour {if you want too!}.
  6. Glue the ears, beard, eye and horns onto your letter G to make your goat.

Mummy do not have the brown foam sheet or construction paper, so as usual as previously use the exercise book cover to replace it.  As usual the followings is the source that Mummy got for the craft and art we are doing here.

Resource: http://totallytots.blogspot.com